Sunday, April 22, 2018

Clothes for Charlotte

I honestly don't love that my children's school has uniforms.  Well, I actually love it for my oldest son.  He's been picky about what he wears starting at a very early age, making us believe it was something he was born with rather than learned.  So we don't have to fight with him about what he wears to school and that's lovely.  But I would love to dress Charlotte in an entirely handmade wardrobe!  The polo shirts and khakis are so glum when I think about the dresses and outfits I could be sending her off in everyday!  But we like the school and one big draw has been that it offers half day morning and afternoon kindergarten- which means I get more time with her at home- and that's one of the many "positives" of the school.

Recently, I got an itch to start sewing more knit patterns.  I often hear other sewists talk about how easy they are to work with.  I've done some knit sewing with Oliver and S and Patterns for Pirates patterns.  I decided to turn to another popular children's pattern company: Violette Field Threads.  I had this one yard cut of plum floral in my stash and decided to make the Amelia top.  I cut everything out except the ruffle trim: I didn't have enough.  I went to Hobby Lobby (where I had originally purchased the fabric) and couldn't believe my luck: they had a full bolt of the exact same fabric and knits were even on sale.  I had bought this print at least 6 months ago and was merely hoping to find a coordinating fabric to use for the ruffle.  I was very lucky! 


I made this top mainly because I was interested in altering the pattern to be dress length and I didn't have a lot of confidence in altering a pattern because I have never done that before (for clothing).  I figured I would start by following the directions exactly and hopefully acquire the confidence to make some changes on the next try. 


At said Hobby Lobby knit sale, I bought two yards of this silky knit floral.  It proved to be a challenging sew simply because of the stretchy-ness and thinness of the material.  But I persevered!  Shortly after finishing the dress, Charlotte wore it to lunch with me at a restaurant and a woman approached me and asked where I bought her dress.  That's the first time that has happened to me!  What a compliment!
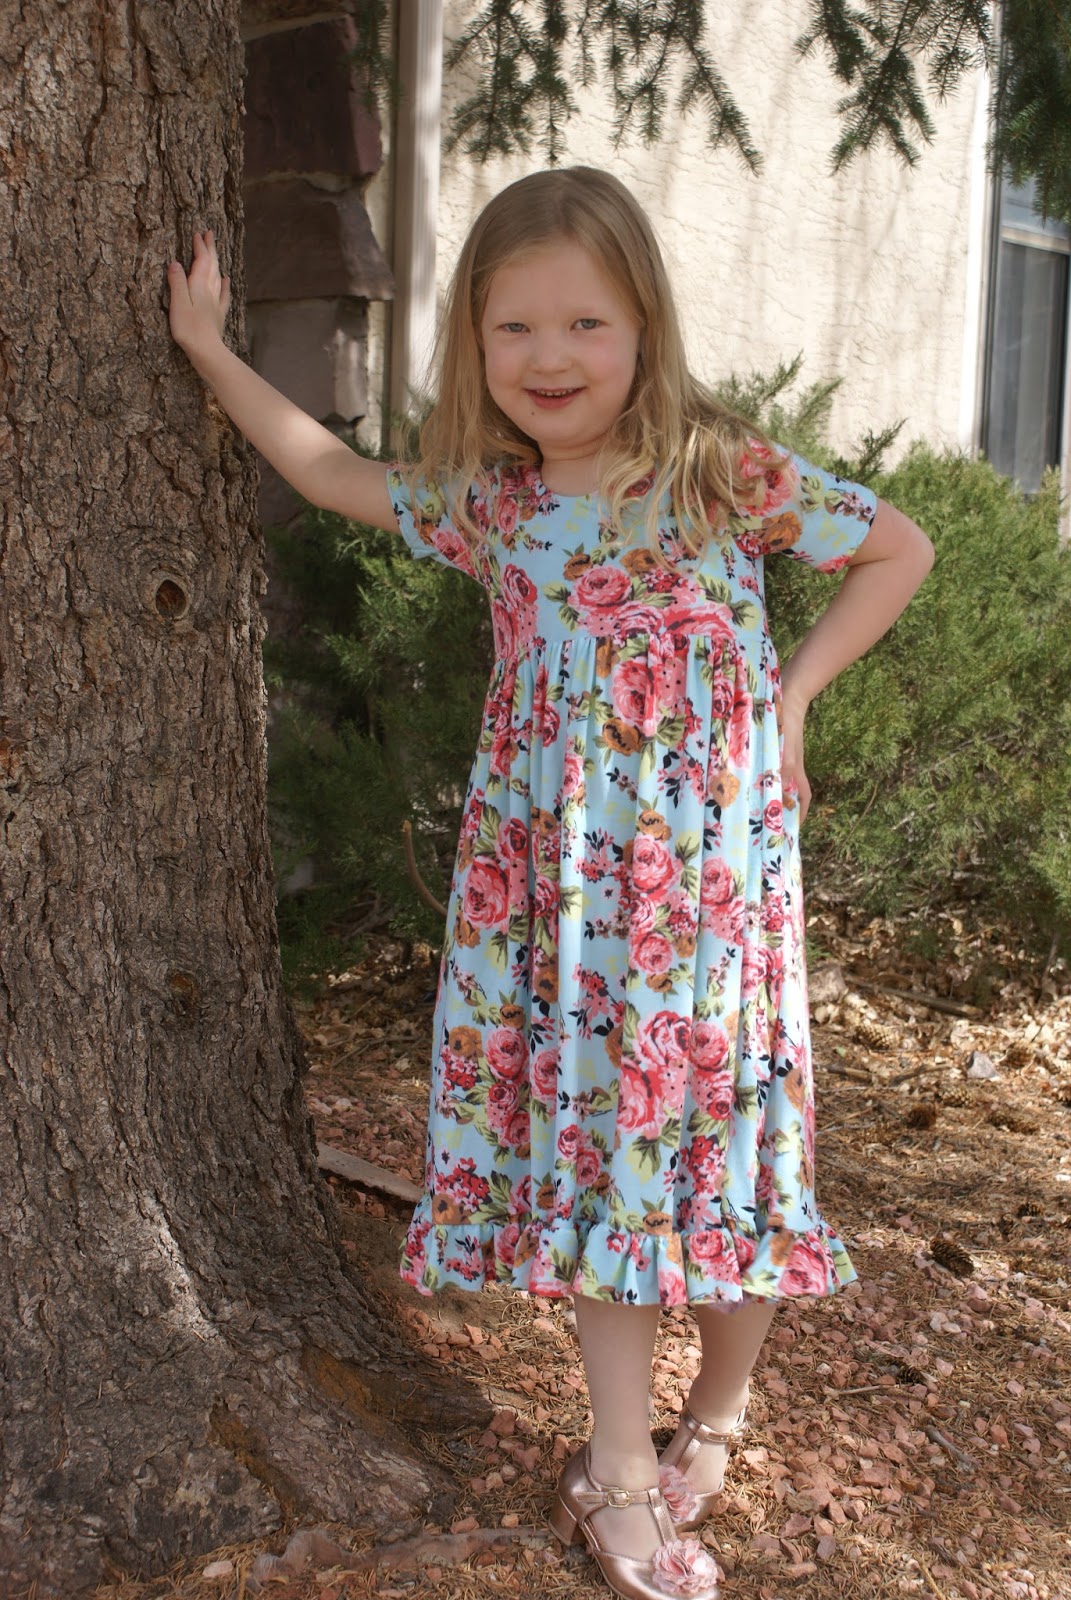


Finally, after making the Amelia top/dress twice, I decided to cut into the more pricey Art Gallery fabric I had grabbed during a Black Friday sale from ilovefabric.com  This knit fabric was so nice to work with and I was much more confident making this dress after having had so much practice. 


About two weeks ago, Charlotte had an event coming: the Daddy/Daughter Princess ball hosted by her school.  This was such a great event, completely put on by school parents and volunteers.  She nearly insisted on wearing a store bought dress but found her choice to be too big (it was a really nice yard sale find that I bought and stowed in her closet).  When I showed her the many stash fabrics she could choose from, for me to make a dress for her, I was quite surprised when she chose this understated cat face silhouette dot fabric from the Meow collection by Riley Blake.  She had so many wild and bold choices with large cats, unicorns, and even squirrels- but this was great!  I already had a plan and the coordinating fabric on hand. 

I made the Dainty Darling dress from the book Sew Classic Clothes for Girls.  This pattern is not as well written as I am used to but my experience in sewing Charlotte clothes has helped build skills that help me in such situations. 


I bought Nick a $8 tie from TJ Maxx and they looked like the purrfect pair! 


I just love sewing Charlotte clothes.  I really think it's helped to have start with such well written patterns by Liesl Gibson of Oliver and S.  I recommend her patterns to everyone because I was able to follow them with confidence from the beginning of my journey in sewing Charlotte clothes.  I have never taken any classes or had any kind of training. 

Even though Charlotte has to wear uniforms to school, she is able to wear all of these dresses to church every Sunday.  Occasionally, there are other times when she needs to be dressed up too.  I honestly would love to have another daughter to pass these clothes on to.  I still have every handmade garment I've ever made her, there's no way I would donate them or get rid of them. 

Thanks for reading!

Friday, March 09, 2018

Finish it Friday: Big Sky Quilt

I have another finish to share!  This quilt came together fast thanks to its small-ish size, using charm packs, and having a deadline.  I made this quilt for one of my favorite friends here in Colorado, Julie.  I met her soon after I had moved from Massachusetts to Colorado and she's been such a blessing in my life.  We met in MOPS (a mom's group) and I have faithfully attended her book group she soon formed after I met her.  For a variety of reasons, I never expected that she would move from Colorado but her husband recently took an opportunity to work in Guam, a place they had lived before.  My friendship with Julie has felt like one of the most genuine friendships I've had while living here and it's pretty sad to have her move so far away.  I knew I wanted to make something special for her before she moved away, so I decided I would make her a quilt.  

I had my eye on the Moda collection, Big Sky for a while.  It has adorable motifs of bears and other forest animals, birch trees, and flora and fauna.  I knew it would be the perfect fabrics to help remind her of home.  I bought two charm packs and added prints from my stash.  I used a pattern in the book Charm School to create this throw size quilt: 


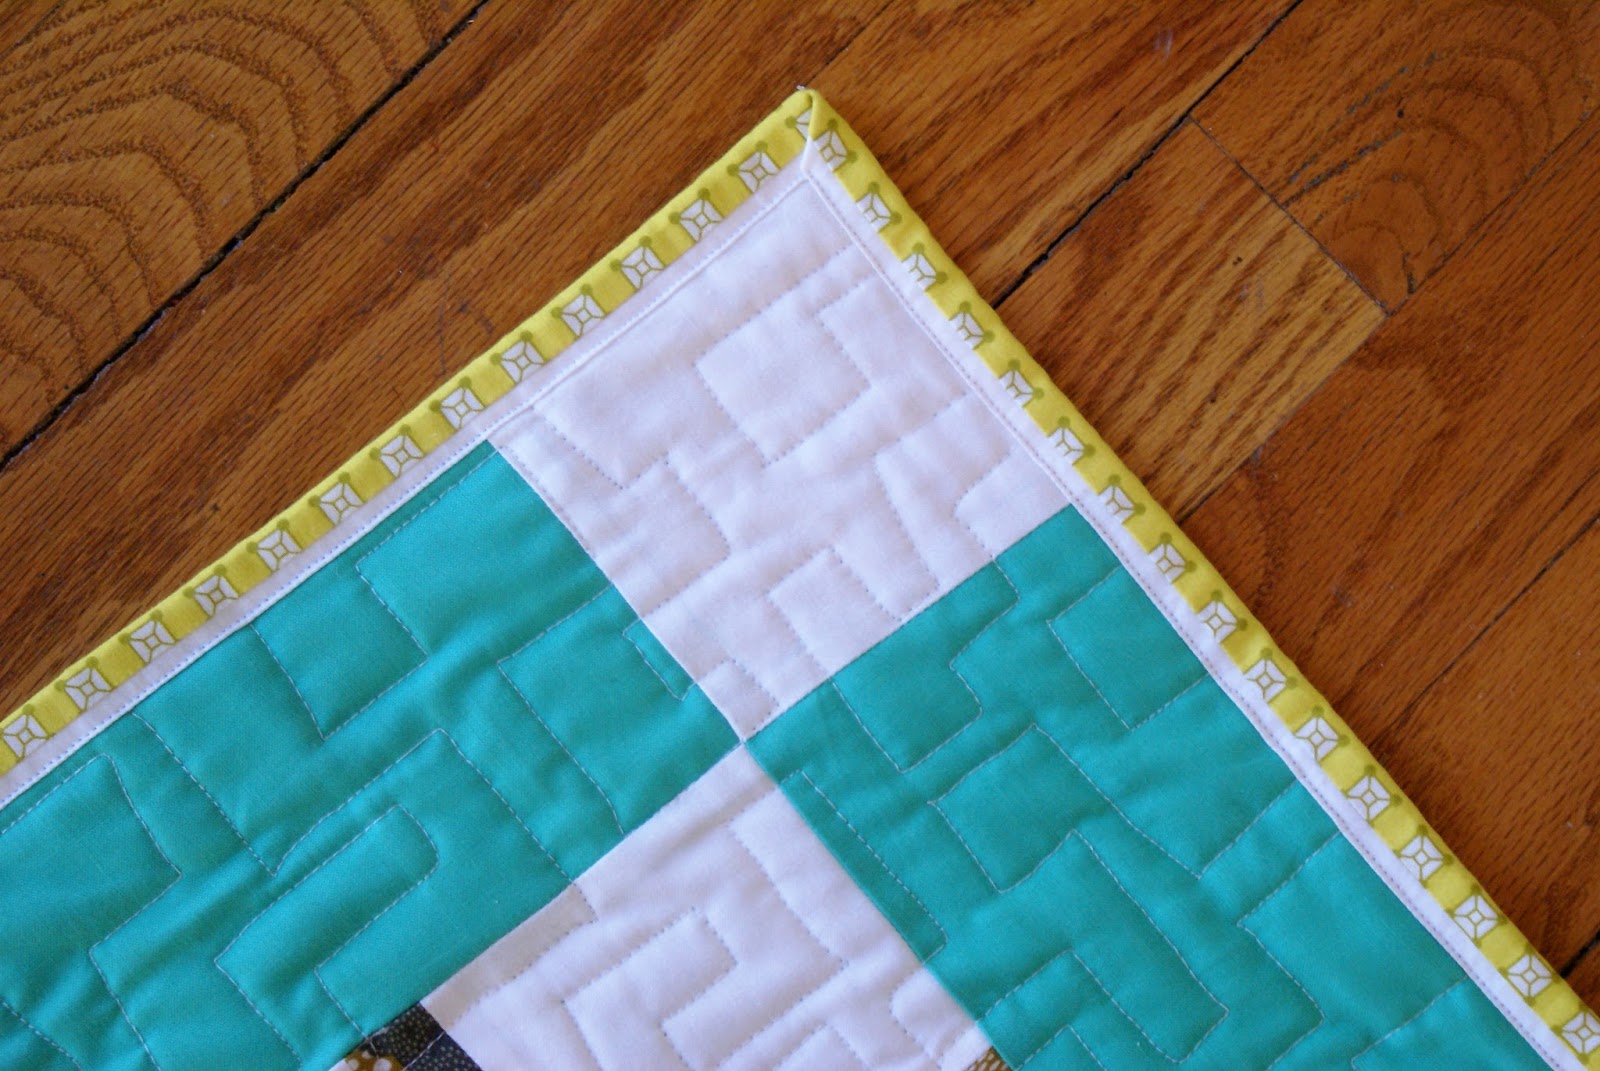
I did a boxy meander all over the quilt, a motif I have been wanting to do on the longarm for quite a while. 


I bound it using the "Suzy's Magic Binding" technique.


In an effort to save money and use the stash (but I have to admit I was sorely tempted to splurge on this Big Sky print for the backing), I created a scrappy backing with fabrics that matched the colors of the front. 


Sadly, with Julie moving, our book club is also dissolving.  I'll admit that I am glad to get back to reading whatever I want, whenever I want- but this group has been a real life line during some pretty lonely years here.  But I am happy to report that emotionally, I am doing better lately with the social dynamics I have encountered here.  More on that soon!

Linking up to Finish it up Friday at Crazy Mom Quilts. 

Friday, March 02, 2018

Finish it up Friday: Baby Gifts

I have three "current project" containers and two of the three have been emptied out- I've been very busy! 

One of my best friends from my undergraduate days, Aimee, recently had her first child: a baby girl named Olivia.  Aimee and I went on a semester abroad to South Africa when we were undergraduates at BYU.  Later we were roommates again when I worked at a center for eating disorders after college graduation.  A few years later, we reconnected when my husband went to law school in Boston and she was in the city working as a nurse.  We don't always keep constant contact but when we reconnect, it's an effortless friendship.

Several months ago, I learned that her nursery theme would be elephants.  I totally have a "thing" for elephant fabric and I gathered all the possibilities from my stash.  I have several juvenile and nursery elephant fabrics, but when I found this dramatic blue elephant fabric, I was really excited.  Her husband is from India and when I asked her opinion on which elephant fabrics she liked, she picked this fun, India-inspired one (like I hoped she would). 

I had this "Taffy"pattern (a Jaybird quilts pattern) from a yard sale and other stash fabrics that easily coordinated with the project.  This whole quilt came together in a mere three days- the large blocks, my excitement, and the fact that the baby came about one week early really spurred me on to get this done fast!


I *almost* did a fast and simple all over FMQ design over the quilt but I am glad I decided to have some fun with different thread colors and motifs within the quilt.  I did a tiny bit of straight line quilting on the purple fabrics on my domestic machine after I did most of the quilting on my longarm.  This is definitely the kind of practice I need to do to improve my longarm FMQ skills!


I also did a new-to-me binding technique: Suzy's Magic binding, a tutorial found on my friend Marti's blog here.  It's a pretty easy technique and joining the ends together worked easily; I used the technique that I always do (found here).  Finishing this binding is done by machine, something pretty necessary when it you think about the wear and tear that comes with a baby quilt. 


I backed the quilt in a Marden's find: an Outfoxed print by Lizzy House plus some fabrics from the front to make it big enough.


I also made Aimee one of my favorite must-have baby makes: the Changing Pad and Diaper Wipes holder from Cluck Cluck Sew.  This project requires a soft (usually stretchy) fabric for the interior, which is the reason I think I don't gift this item often enough.  But it's SO useful and handy- I've used one for each of my babies.  While I was making one for Aimee, I decided to make another for another friend who just had a baby boy:


This holder/pad is SO handy for being out and about with a little one.  You know how awkward it can feel to do a quick change at a playdate or you have to change your little one in a public restroom- this is so functional for guarding the environment from any mess as well as protecting the baby from germs.  It goes right in the wash easily too.


Another item I really like to have for a baby is a nice big receiving blanket.  I buy 1.25 yards each of two coordinating flannel fabrics.  I prewash them and trim them to the same size.  I round the corners with a plate or bowl and sew them together with a big hole for turning.  I flip it all right side out and do a generous edge stitch to complete it.  I find these so useful for all types of weather, it can be a makeshift car seat cover, it's great for swaddling, and it's so much more useful than those tiny, one-layer store-bought receiving blankets.


Finally, I made some burp cloths for both babies.  My first baby was such a spitter- I literally had about 25 of these in rotation.  I've gifted these to friends many times and I always receive grateful feedback.


Sewing for all these sweet babies has been a lot of fun.  I think I'll be sad when I am out of this phase of life when I can sew for little ones so frequently.  Linking up to Finish it up Friday at Crazy Mom Quilts. 

Sunday, January 28, 2018

Union Jack Quilt Finished

 My first big finish of 2018: the Union Jack quilt!  I am so excited to have this long-term WIP completed- I started it almost three years ago.  It's probably the biggest quilt I have ever made, measuring 98" x 116"!  Finding a way to photograph it without it dragging on the ground was a challenge- so my husband agreed to help me with a roof picture. 


My initial motivation to make this quilt were two simple factors: It is very easy paper piecing that I wanted to try and I loved how large scale prints could be showcased in the flag blocks.  I do not have a significant love or affinity for England.  I had a full day layover there once and that's about it- I'll admit that I am not really that excited about this quilt overall; it turned out how I wanted but it doesn't have that "wow" factor for me personally.


The pattern for this quilt came from issue #8 of Love Patchwork and Quilting Magazine, Lynne Goldsworthy is the author of the pattern. 


To back this quilt, I unearthed a very long-ago purchase of Joel Dewberry Heirloom fabrics.  I love Joel's work and fabrics, but I don't tend to grab them first, as an exciting addition to my projects.  I'm often trying to to use what's in my stash, even though the colors don't coordinate perfectly with the front.   

I bound the quilt in a Patty Sloniger Bakeshop fabric.  I quilted the quilt myself on my longarm- a process that easily took over 10 hours.  I thought I might do some twirly-swirly stuff in each of the flags, but decided my FMQ skills weren't good enough, I didn't have all of the right color threads to make it tone on tone, the width of my longarm quilting space isn't large enough to accommodate the vertical rectangles in the center of the flags, and I really just wanted the quilt finished sooner than later.  I felt a little guilty about not being more intricate with the quilting but the truth is that I don't love this quilt SO much that I want to spend hours and hours finishing it- I got the three layers together and didn't resort to simple stippling, which makes me happy.  It's done and that's what matters.


Thanks for reading!  This post shows that I actually completed my January goal via the "One Monthly Goal" initiative by Elm Street Quilts- thanks for the motivation Patty!  Also linking up to Finish it up Friday at Crazy Mom Quilts.

Sunday, January 07, 2018

One Monthly Goal: Finish the Union Jack quilt in January 2018

After participating in the Bag-It event at Elm Street Quilts, I have learned about the One Monthly Goal initiative and I am in!  I simply have to make a goal at the beginning of the month and try to accomplish it at the end of the month- and document my intentions/results.

After quilting the snails quilt, I put the Union Jack quilt right onto my longarm.  And it's been there for maybe a month?!  I am scared, I don't know what type of free motion quilting to do in the borders!  But I've got to get going on it, as there will be other things to load onto the longarm soon enough and loading a quilt onto a longarm frame is not something you want to do more than once for the same quilt.  I just need to myself that "finished is better than perfect," right?!

I haven't done well in documenting this quilt, but it's been a WIP for quite a while and finishing the quilt top a few months ago felt like a major accomplishment.  I hope to share a finished quilt at the end of the month!


Linking up to Elm Street Quilts at the January linkup.

Friday, December 22, 2017

Finish it up Friday: Garden Snails Quilt

 I finished the Garden Snails quilt top on July 31 but didn't quilt and bind it until this past week.  I was seriously scared of using my longarm on it- that's probably a post for another day.  But I recently realized that in 2017, I have made four quilt tops and quilted none of them.  I decided to just go for it- finally! 

The Garden Snails Quilt QAL was an activity on IG that I participated in, hosted by Angie at GnomeAngel.  I have finally realized that I really like participating in QAL's because there are deadlines (I really like Gretchen Rubin's 4 Tendencies framework and I am definitely an obliger) and a sense of community. 

This quilt was not easy for me even though it shouldn't have been difficult.  My big problem was that after I finally settled on a color and fabric scheme- I did the snail tails wrong and didn't realize until I had made at least 7 snails!  I am actually glad someone asked me on IG why I was making the tails so big- I hadn't caught the error myself. 
  

The fabrics I used for this quilt included: Cirrus Solids in rain for the background (a while ago I came upon an Etsy seller who was transitioning her fabric shop to a custom embroidery shop and I scored tons of Cirrus Solids fabrics for super cheap - it was AWESOME and it's my favorite fabric to use as a background in my quilts).  The other fabrics I used were a bundle of Made by Rae's Lotus Pond and a Michael Miller creamy white solid for the snail bodies.  I threw in a few other stash fabrics to mix with the Lotus Pond too. 

When I finally quilted the quilt top this past week, I aimed for "snail trails"- wavy lines with a few swirls thrown in.  I was pretty happy with how it came out!


For the backing, I had three yards of the Lotus Pond snail fabric and then I raided my blues (a fabric color I don't use as often as I should) to fill in the rest. 


The binding is a white on Navy cross-hatch from the House of Hoppington collection.  I really love it!


This is probably my last finish of 2017- it feels so good!  Linking up to Finish it up Friday at Crazy Mom Quilts. 

Wednesday, December 20, 2017

Swap Items Given

The main item I made for a recent swap is this Take Wing butterfly quilt.  My partner stated she wanted a mini quilt (she has quite a collection of minis hanging in her sewing room) and it took me a while to decide on a pattern/style.  It finally hit me that she likes butterflies and the ROYGBV style.  I also thought it would be fun to do this Lillyella pattern because the swap party was going to be hosted by the pattern's author, Nicole. 

I know that this quilt looks good, but dang (!)- I am just not that great at paper piecing.  I used close to a yard of the white background starry print- getting those angles to go just right does not come easily for me. 


Here's a picture of all the items I gave Melissa.  That "Teeny Tiny Nativity" is one of my favorite gifts to give: it's illustrated by a very talented modern-style artist: Helen Dardik and it's just so cute!  It's also priced just right for gift exchange parties. 

(I know this quality of this picture is not great- but I did the best I could with losing daylight and needing to get off to the party!).

Our little group of sewing friends has decided to participate in a little birthday swap this year, where we'll make and send small gifts to each other during everyone's birthday months.  Should be fun and more meaningful than doing this with a bunch of strangers.

I am definitely not very involved in attending the FRMQG (their meetings are always on Saturday morning and their meeting place keeps getting closer and closer to Denver and further from Springs) but I am glad I have found "my people" through the guild and plan to attend the spring retreat.

Friday, December 15, 2017

Tula Pink Butterfly Quilt Top Finished

Just before all my craft fair craziness started, I decided to participate in the Tula Pink Butterfly QAL, hosted by GnomeAngel.  I got a late start because I wasn't sure what color scheme to use, but finally decided on a stash pile of warm colors: pink, orange, and yellow.  I soon got derailed on the timing of the QAL because my sewing machine ended up in the shop for 3 weeks (turned out nothing was even wrong with it!).... but I eventually caught up.  

Just before the QAL ended, I was able to finish the quilt top.  I can easily say that this was the most challenging quilt I've ever pieced.  Here's why:

  • The curved blocks!  I've heard from other people that they are the. worst.  I really struggled with the smallest ones- the larger the curve, the easier it was to construct.  
  • Those curved blocks?  Make sure you make them mirror image.  I didn't.  I had to remake some of the hardest ones!
  • Fabric selection: Doing a color gradation approach was no picnic.  It definitely doesn't come natural to me, I really like high contrast in my piecing and doing that within the same color is not easy.
  • Piecing all the pieces together was not easy either.  Many readers may recall that I love my Triangulations "software" that helped me complete the 154 HST's in an afternoon.... but I found that they were a bit on the small side when I had to piece them with my other blocks.  My best guess for why this happened?  Maybe the way I cut and measure is a tad bigger than Triangulations standards.  
  • Making everything twice got old for me.  Especially if it was something challenging to piece- you "get through it," and then you have to do it again.


I really did have fun choosing fun fabrics to include in the quilt top, lots of little creature motifs and I love the use of the Brambleberry Ridge bird background fabric. 


I was one of the three winners of the QAL, so that was exciting. 

I have to admit that I am a quite scared to put this on my longarm and finish her up....  it's very intimidating to try to think of how I could custom quilt this with my limited free motion quilting skills.  It will be a while before I have the courage to put this on my machine.

Linking up to Finish it up Friday at Crazy Mom Quilts.

Thursday, December 14, 2017

Custom Order Bags

Just as the craft fairs ended, I received two requests for custom orders.  I agreed to complete them and found that I really enjoyed the projects.  It was really nice to have a guaranteed sale, rather than make something without being positive it would sell.  I also really liked being able to be creative and think outside the box a little.  

A friend from high school asked me to make her young children Christmas stockings.  I have made unique, patchwork stockings for all of my children previously and it's a fun project.  This friend gave me quite a lot of creative license to do whatever I wanted- which did feel a little intimidating- but freeing at the same time.  The only caveat she gave me was, "Don't use cutesy characters."  I'll admit that was a little bit of a challenge, because I love that cute stuff for kids.  But I am sure what I created for her will have the benefit of not being outgrown in a few years.

I used all stash fabric, mostly scraps of Brambleberry Ridge fabrics, along with some RK metallic gold linen.  I am particularly proud of the gold linen addition- I had some leftover from making some pouches for the craft fairs and it really calms the busyness of the scrappy, patchwork look.  I barely had enough for two cuffs, but I am happy I made it work.


Here's the back of the stockings:


Another custom order I completed was a result of my husband running my booth at my last craft fair.  I was only gone for about thirty minutes, but enjoyed spending time with my kids while he made sales.  A lady came by and fell in love with a dog themed pouch I had made and wondered if I could make one that featured Pugs.  One thing led to another, and eventually she decided she would buy Pug fabric locally and she brought the fabric to me.  I made a large sized pouch:


This fabric cracks me up because of the funny expressions on the dogs faces as well as the scale of the print; but I am proud to have made a really nice looking pouch and my customer was very happy.  She is gifting it to a friend who lost their pet recently.

Today, I almost took on another custom order but it didn't work out.  A lady was looking for someone to make "a zippered pillow cover with some fabric I have."  I contacted her with confidence because the type of project I thought she was talking about seemed very simple.  It turned out that she wanted someone to repair a broken invisible zipper on an existing upholstery weight couch cushion = VERY different than what she had originally stated.  I kindly declined after learning more. 

Custom work is definitely a learning experience and I am just beginning.  I'll let you know if more opportunities come along. 

Linking up to Elm Streets Bag It event.   (Stockings may be considered an unconventional item to be referred to as a "bag" but it works!   Participant guidelines state, "For this event, a bag is defined as a container made of fabric that you can put something inside."  I definitely employed several bag making techniques when making them).

Tuesday, December 12, 2017

Craft Fairs 2017: What I Made Part I

I participated in  three craft fairs this year, two on November 11 and one on December 2.  Signing up for two on one day was probably not the smartest thing I've ever done- but I did manage to pull off making enough inventory for two booths.  I sewed like a maniac.  Here's how I did it:

  • Tons of support from my husband, he did most of the cooking and helped a lot with other household chores- this isn't hugely out of the norm anyway, but I'll admit our time together in the evenings suffered.
  • My youngest started taking two naps again.  He's been taking a morning nap and an afternoon nap now for the past two months.  During his morning nap, my daughter and I often have "studio time" where she does crafts, draws, or reads to me while I sew  
  • I stopped doing a lot of things for myself.  I completely gave up Netflix, reading for pleasure, exercise on many days (I didn't give it up completely), etc.  Initially, I had a few late-nighters but quickly saw how counter productive it was and made myself quit by 10 pm.  I will admit I slacked on eating a healthful diet and "saved time" by snacking rather than having a real lunch during any of my precious hours of child-free time.  
  • I tried to not neglect important people and events.  I made time for my church responsibilities, never sewed craft fair stuff on Sundays, fully celebrated Halloween and Thanksgiving with my family, and enjoyed visits from out of town family a few times during this time period.  
  • Overall, the experience was pretty exhausting and I'll admit I *might* be a little tired of sewing right now.  But I actually think it was all worth it, and I'll explain why in my next post.
Here are some of the fruits of my labors:

Tons of gift/business/store loyalty card wallets.  I don't have pictures of all that I made.  This picture happens to represent the ones I made from just scraps.  Very satisfying to use up so many scraps but it was often time consuming to dig out the correct sizes of scraps that would coordinate together.  Eventually, I just started pulling coordinating fat quarters and made several identical ones.  These sold very well.


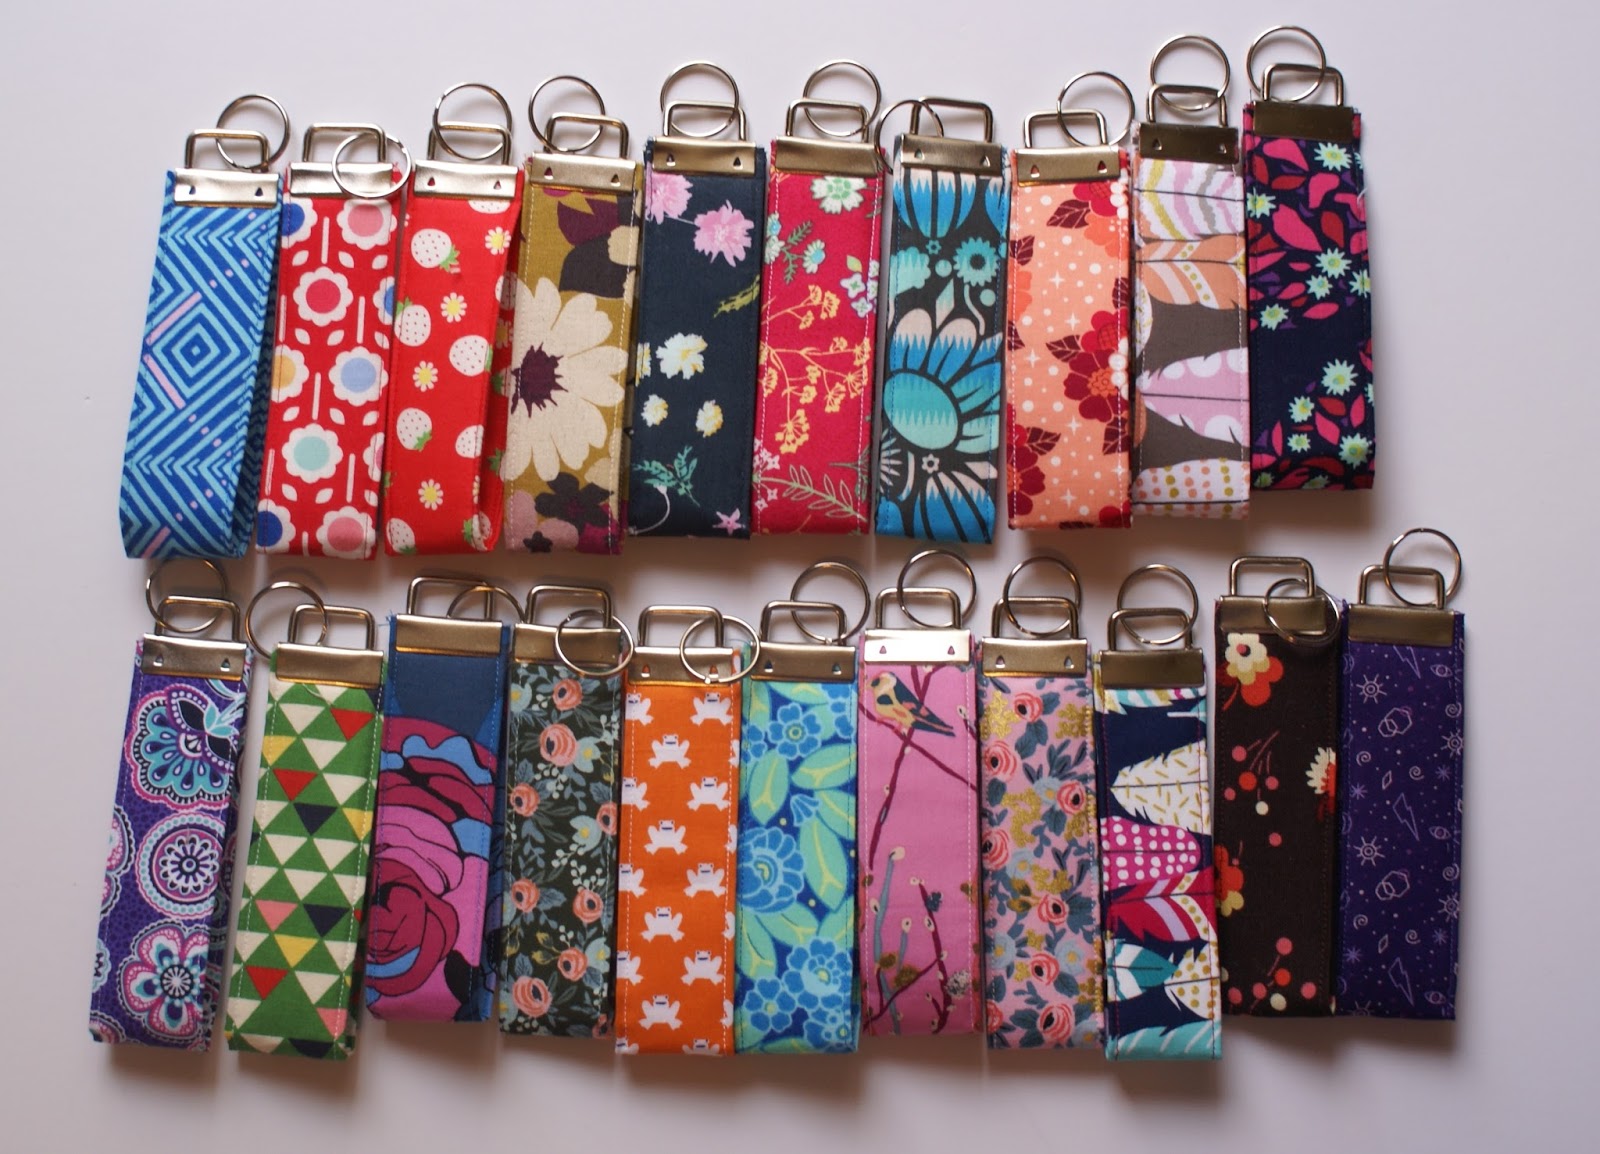
Key Fobs: These were also made from scraps.  They did not sell well at all, I sold one and gave away one.


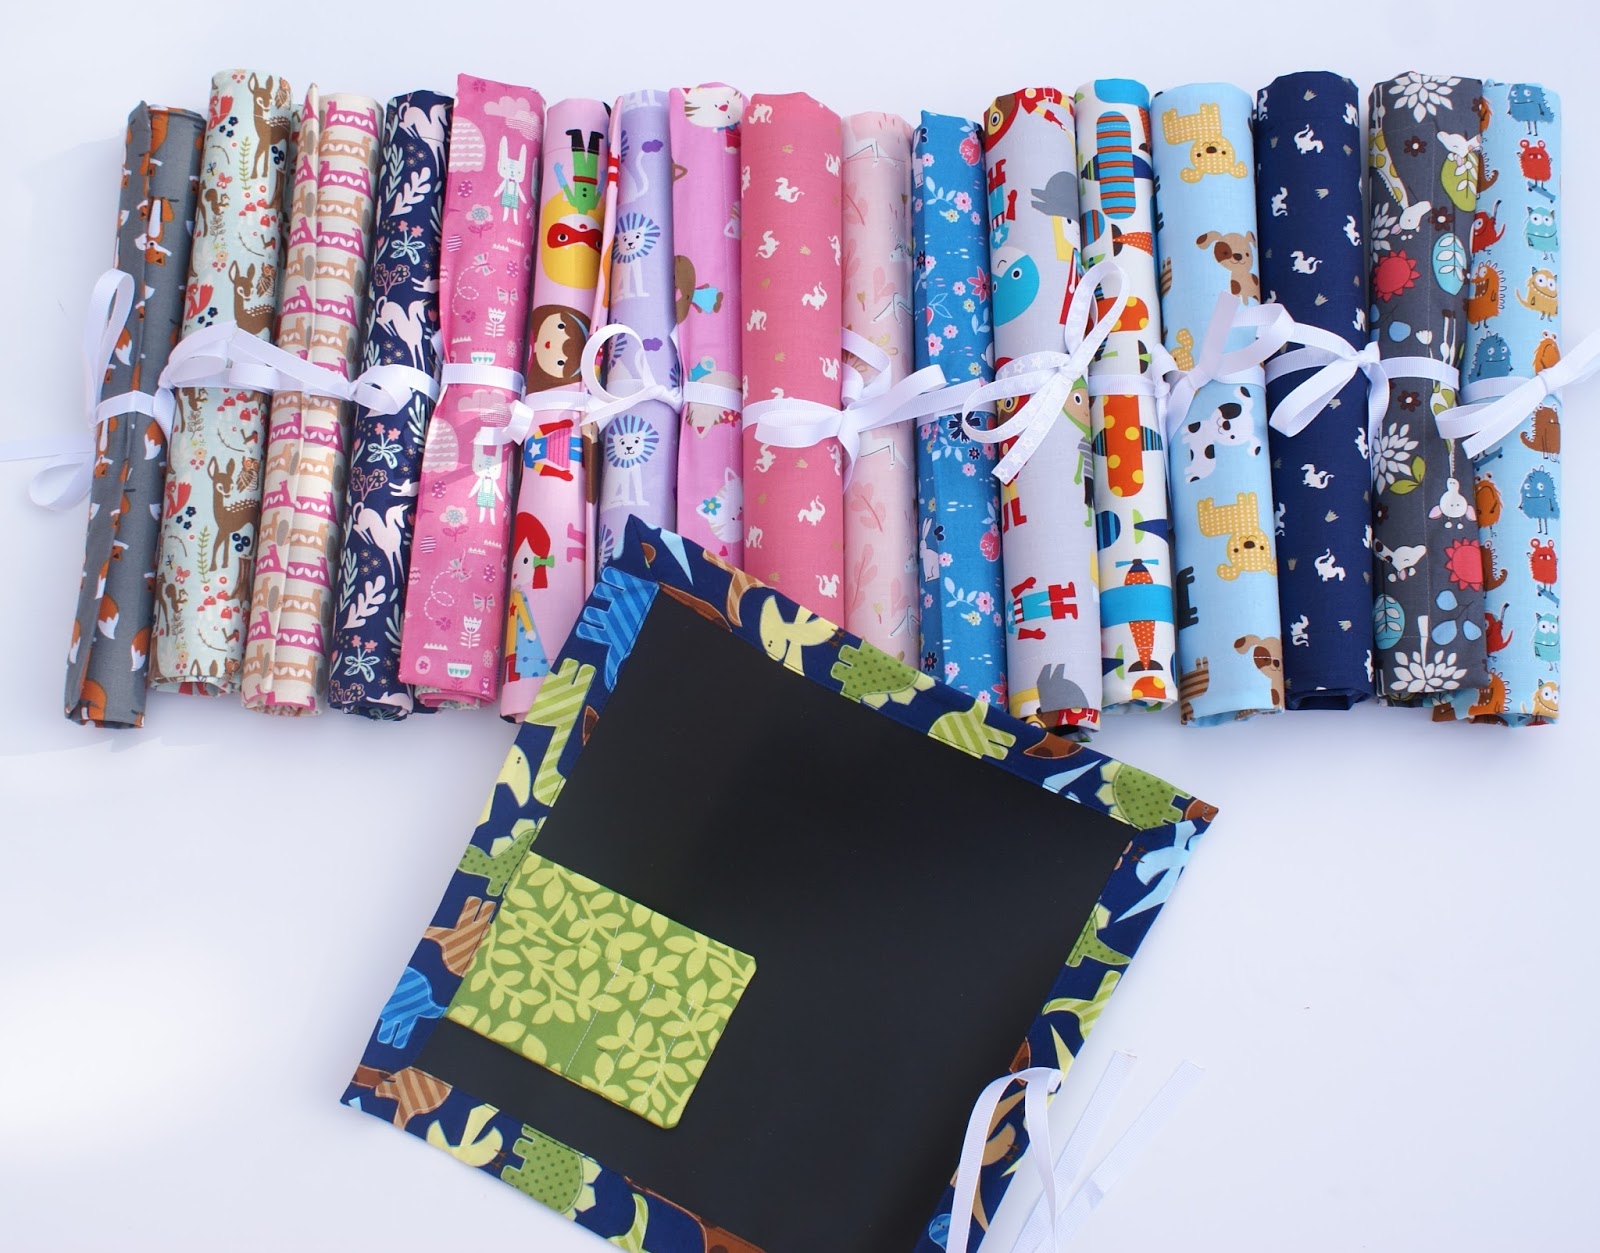
Colored Pencil Rolls: These were very time consuming to make.  I actually made twenty-four!  It forced me to buy and learn how to use invisible thread.  They were one of my higher priced items: $22.  I sold a dozen and was happy with that. 


Chalkboard Rolls: This is another project that I "over cut" exterior fabrics for.  I just got into a "zone" and cut maybe 33 outer squares when I had meant to only cut 20.  After realizing my mistake, I just went with it and made tons of these.  They sold quite well at my November sales but I only sold two at my December fair. 


I really tried to go heavy on the girl designs for bibs because that was what was most popular last year.  When I was setting up my booth at the Liberty HS fair, a friend of a vendor came over and talked to me about my bibs and my taste in fabric- she was really smitten with the designs and bright colors.  Before I knew it, I had agreed to complete a custom order for her that evening!  It was a big boost of confidence for me to have basically made a sale the night before the big show.  I whipped out three bibs for her that evening and she bought them early the next morning.  She was a sweetheart, expecting a grandson soon and was excited to have a unique gift.  Overall, the bibs weren't a hug seller for me but they definitely caught a lot of people's attention.


Crayon Wallets: These sold pretty well overall, particularly the boy designs.


While sewing for the fairs, I used mostly stash fabrics but I did order a few "trendy" fabrics, like donuts, feathers, and unicorns.  Surprisingly, these weren't a big draw to people.  I sold one donut pouch and several of the gift card wallets in the feather fabrics, but I have most of that inventory left over.  I did use some of my favorite Japanese import fabrics with cat illustrations on them and had a mother daughter pair visit my booth four times, spending a total of $51 on kitty themed pouches. 


Well, this post is pretty lengthy, so I think I'll continue my craft fair thoughts and pictures in another post.  I'll share more soon!

Sunday, December 10, 2017

Fold Up Sewing Folio

 SO much to catch up on.  It's been a CRAZY 6 weeks or so since I last blogged.  I have survived three craft fairs, completed the Tula Pink Butterfly QAL, participated in a handmade Christmas present swap with guild friends, and quilted my first customer quilt on the longarm!  I actually have just two more "obligation/deadline" sewing projects to complete and then I am FREE!!!!

But I wanted to take a break this Sunday morning and share a special project I made for my swap partner: the Fold Up Sewing Folio, pattern by Aneela Hooey, found in her newest book: Stitched Sewing Organizers.

Now here's the embarrassing part about this pouch: this is the second Folio I've made because I lost the first one.  I made my swap partner a Folio right after two of my craft fairs, to give myself a little break, but also to get a head start on swap items so that I would not leave everything until the last minute....  And as the swap approached, I could not find the folio I had made!  I searched the house high and low and my husband helped me too!  It was SO frustrating and I felt like I was wasting so much time because I had so many deadlines I had to contend with.  So I finally gave in and just made another one. I still haven't found the one I lost.

Here's the outside of the pouch, made in a Menagerie floral:


And here's the inside, complete with two zippered pockets, a pincushion, wool felt pages for needles, and some pockets.

(Sorry for the blueness of the photos, I took these just a few hours before I left for the party and it was my only opportunity to take the pictures).


Making this pouch is a little time consuming but it's not that bad.  I actually made a mistake on the second pouch that I didn't make on the first: trimming down zippers to fit the project specifications is just a little tricky and you really have to pay attention to what you want the end measurement to be! 

My swap partner, Melissa, definitely seemed happy with receiving this gift.  She is undertaking the Tula Pink Nova EPP project soon, and I bet this will come in handy!

Linking up to Elm Street Quilts 2017 Bag It event.  Have a look at all the other bags being made this fall/winter.

Sunday, October 29, 2017

Knit Panic: Summer Garment Sewing

As I try to catch up on recording my sewing here, this post will showcase the clothing items I made for Charlotte this summer and fall.  It all started when I had a little bit of a panicked feeling, realizing that I had a few one yard cuts of knit fabric stowed away- fabric intended to be dresses for Charlotte.  My days of being able to just buy one yard of fabric for my growing daughter are nearly over.  She's growing so fast.  

So I started with this one yard of Ann Kelle flower knit.  I started on to cut the fabric for a Me Hearties dress (Patterns for Pirates), after cutting the large circle skirt, I soon realized that I did not have enough fabric to cut out the bodice pieces for the dress.  It did not help that this particular fabric seriously had a 3-4" selvedge!  I ran to the computer to see if I could buy more of the fabric somewhere and I did find a source quickly.  But I really didn't like the idea of spending at least $13 more to make up for my mistake- especially when I was really trying to use up the fabric I already had and not buy more!

So I decided I'd try my hand at making Charlotte a skirt.  I don't think I've ever made her a skirt before- dresses are just so satisfying to make....  I clumsily handled the upper part of the circle skirt piece and tried to see if I could simply fold it over to make an elastic channel.  That did not work.  I returned to the internet and found a tutorial that taught me how to put an elastic waistband on the circle skirt piece and I had it done in less than an hour.  (I think I used this tutorial on Pretty Providence.)


Within the same week, I was able to make a Me Hearties dress with another one yard cut of knit fabric (cutting much more carefully this time and it helped a lot that the selvedge for this fabric was much thinner):


As much as I love the Me Hearties dress, I really wanted to try another knit dress pattern.  Happily, I already had one in my stash: the Hopscotch dress pattern by Oliver and S.  This pattern was a total game changer in using up stash- you only need one yard (or less!) to make a size 6 and I whipped up this hot air balloon dress in less than an hour.  It honestly is the EASIEST garment I have ever made in my life.  I made it just in time for our favorite Colorado Springs event - Labor Day Liftoff.  Poor Charlotte is being a good sport but she was cold when I had her take off her jacket for this picture.  


  I soon made another Hopscotch dress for a visit to the Denver aquarium- we love to be corny and theme our wardrobe choices with fun destinations:


So I was definitely happy to use up about four yards of stashed knit fabric.  I've decided it's definitely a little stressful to stash garment fabrics- the intended recipient might eventually outgrow the yardage you've acquired!  Lesson learned.

Finally, just before the craft fair craziness descended on my life, I made Charlotte an Oliver and S Apple Picking dress.

Here she is posed in front of a sneak peak of a recently finished quilt top I still need to document on the blog:


In the early days after Charlotte's birth, I put her in a cute little yellow sleeper and my mom and I agreed that "yellow was not her color."  Haha!  Fashion choices for a newborn.......  But I think she pulls this dress off rather well.  The fabric was a bargain find when I stumbled upon the Keepsake Quilting clearance sale last summer. 


Thanks for reading!