Saturday, July 28, 2012

Tutorial: How to Make a Quilt with a Super-soft (and stretchy!) Backing

"Ironic" is the word I would use to describe the fact that my son prefers a store-bought Carter's baby blanket to the 6 quilts I have made him.  This blanket comes along with Gregory wherever he goes and as he approaches his 3rd birthday this fall, I am still a little annoyed that he hasn't "attached" to any of the special quilts that I have made him.  I really think it comes down to texture and the softness of the blankie.  This is why I have taken it upon myself to learn how to make a quilt with a soft backing on my domestic machine.
Disclaimer:  Attaching Minkee or Soft-and-Cuddly fabrics is kind of a pain in the butt.  I recommend you only endeavor this technique if texture and softness is really important to the intended recipient of the quilt.

Step 1: Quilt your quilt top directly onto batting with nothing else - it's just two layers.  I baste my quilt top onto Warm and Natural batting (from Joann's) with safety pins and then I quilt it on my machine.  Then I trim off the extra batting on the sides, as shown below:
 Step 2:  Tape a piece of soft backing fabric onto the floor, "good side" down.  I tape each corner - and that is it.
 Step 3:  Pin your quilted top onto the backing fabric with a few pins around each side.
 Step 4:  Cut your backing fabric to size around the quilted top.  Give yourself a little breathing room because you are going to pin more in the next step and you don't want the backing fabric to be too small.
 Step 5:  Use a lot more pins to make the quilted top more firmly affixed to the backing fabric, trim the backing more if necessary.
 Step 6:  Use a zig-zag stitch to go all around the edge of the quilt.  You will have to go slowly and pay special attention to the backing fabric trying to wiggle and shrink away from the quilt's edge.  Just be patient and do this step carefully. 
Step 7:  You will also want to attach the quilt onto the backing on an area besides the outer edges.  The pattern I used made it very easy for me to stitch a square in the ditch. 
 You can't see the square on the front of the quilt, but you can discern it on the back:
 Step 8: Bind your quilt as you normally would.  If you find that your quilt is a little thicker than normal, I would recommend using a wider binding.  For example, I used a 3" binding on my Girly Spiderweb quilt. 

So there you have it, a quilt with a soft backing.  As you can tell, the backing is a little loose/lumpy on the back but I am satisfied with it.  I have used soft backing on other quilts and each backing fabric I have used has varied in difficulty to work with.  Of course, this soft whale fabric I used for this tutorial probably was the most annoying one I have encountered- being particularly stretchy on the horizontal grain.  (Is that even a real term? I don't know.)
I hope this tutorial is helpful to some of my readers, let me know if you have any questions.

Monday, July 23, 2012

Whale Quilt, Part II

Thanks to everyone for their kindness and encouragement regarding my Anne Kelle Christmas projects.  It was no small feat to get all of that completed after having a baby!  But it was worth it - I truly love her fabrics and creating something for her blog was literally a "bucket list" kind of accomplishment for me.

So, after getting all of that stuff done- I definitely had Anne Kelle fabrics on the brain.  Earlier this year, when I learned that I had had a baby girl, I knew that a pink version of my son's whale blanket must be made ASAP.  So here is Charlotte's fourth quilt (and she's only 4 months old!):

 I bought this pink whale sleeper shortly after she was born, knowing that she would eventually have a whale quilt to match:
 I debated doing a fuzzy/minkee-like backing, but my decision was easy when I spotted this whale "soft and cuddly" fabric at Joann's:
 I bound the quilt in the leftover strips from the front:
 Here are my two little rascals cuddling their quilts together:
 I just love the whale fabric, the simple design of squares in squares, and the effective use of solid fabrics. 

During the process of making Charlotte's quilt, I attempted to take pictures of the process of making a quilt with a minkee-like backing fabric.  Tutorial to come very soon!

Sunday, July 22, 2012

BMQG at the Lowell Quilt Festival


I would like to invite all of my readers to attend our quilt show that is coming up in a few weeks.  I learned of this opportunity on New Year's Eve last year and I can't believe it's now only a few weeks away!  Our guild is so thrilled to have this chance to show our work to the public in a very major show in our own venue.  Additionally, I will be speaking on a panel on August 10, Friday morning with Mary and Marianne Fons as well as my friend from the guild, Rachel May.  See a description of the Panel Discussion here. 

Wednesday, July 18, 2012

Christmas in July


Check out my tutorial on how to make this quilt on one of my favorite fabric designer's blogs: Ann Kelle.  This quilt was a lot of fun to make and the pattern I created yielded a fair amount of scraps.  In this post, I will show you what I did with all of those yummy leftovers.
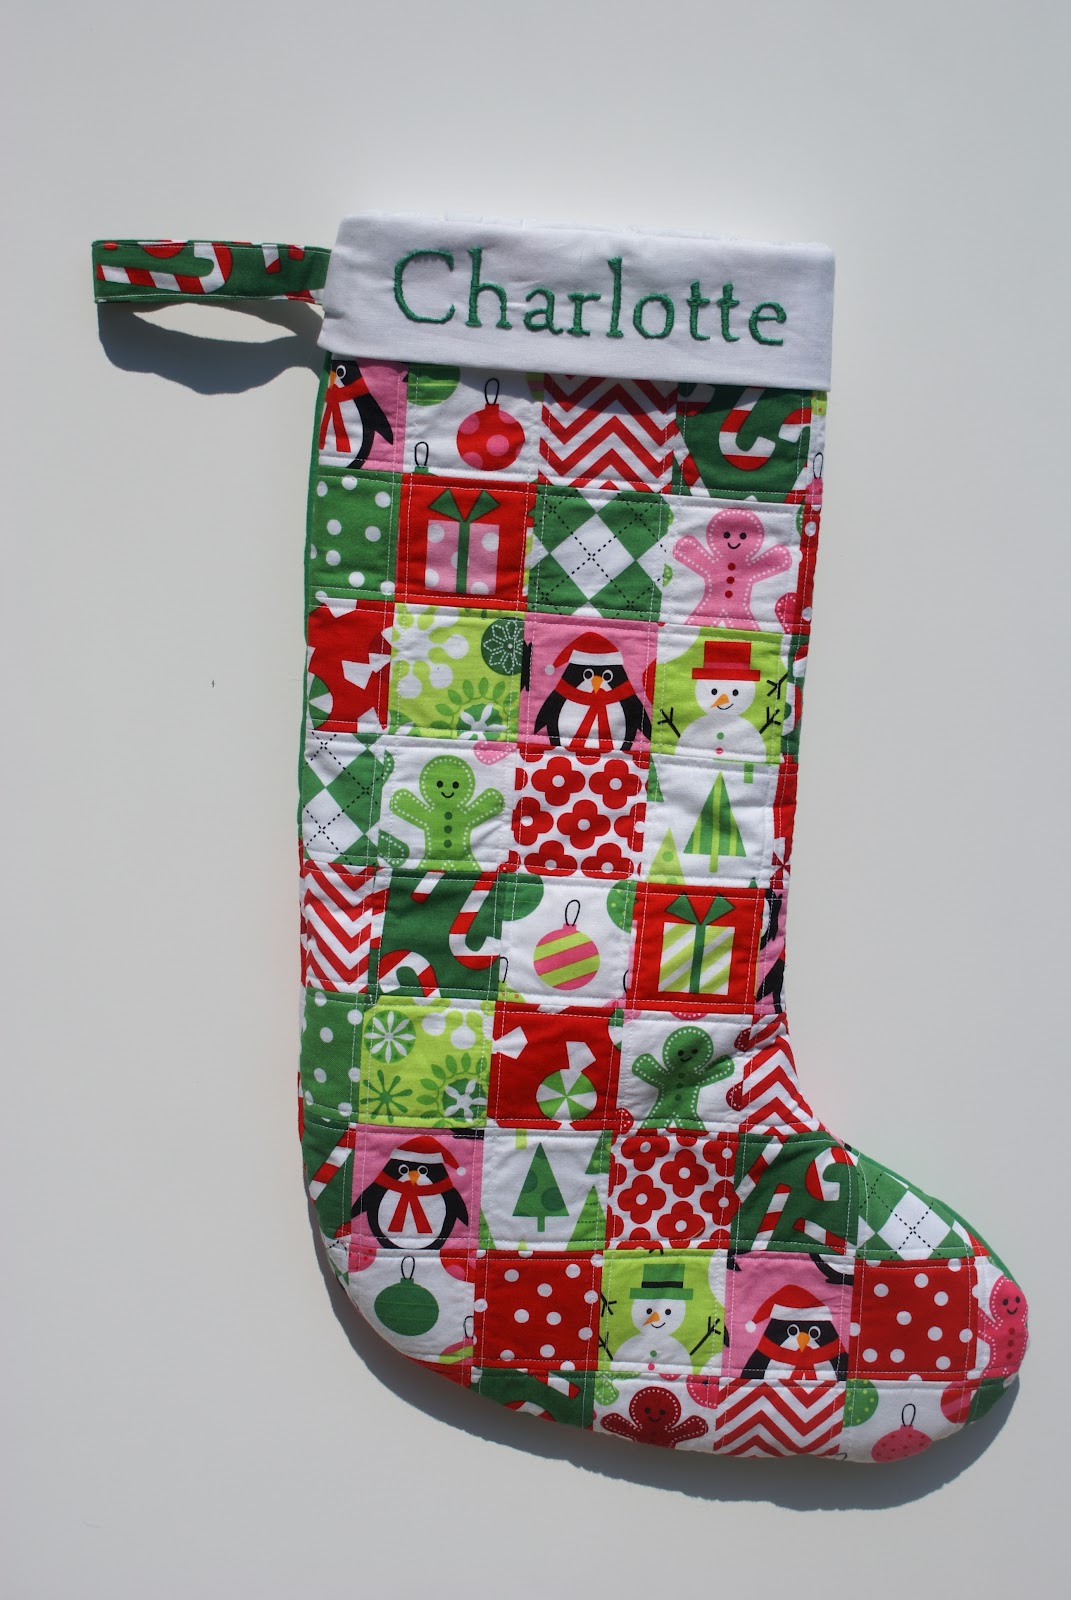
Making a Christmas stocking for our family's newest edition was a no-brainer.  Using 2.5" squares, I created a youthful patchwork design and hand-embroidered her name on the cuff. 
I created a simple design on the back, using some Kona Cotton Clover and more Jingle.
Finally, I was thrilled to make a Christmas tree skirt to replace our family's TJ-Maxx special we'd purchased right after we were married.  I made teeny dresden plates with Kona solids that match the Jingle line (Red, Rich Red, Chartreuse, Bubblegum Pink, and Clover) and centered a Jingle print in each of the 16 plates.

I hand appliqued the plates and circles to the quilted tree skirt.  It actually didn't take as long as I thought it would and it looks a lot better than machine stitching.
I used my old tree skirt as a makeshift pattern for the shape of the tree skirt after I had quilted a large whole-cloth quilt on my machine.  I bound the skirt in bias binding and used buttons and hair elastics to make the skirt be able to open and close.
Thanks so much to Kelle for letting me play with her Jingle fabrics.  I had so much fun making all of these items and look forward to using them this Christmas season and many more years to come!

Monday, July 16, 2012

Double Nine Patch Completed!

My family has been attacked by a horrible stomach virus this past week.  I have never seen my son so sick and having my little baby effected has not been fun either.  There was one day where my baby was happy and healthy (and napping a lot) and my son could do no more than watch Disney movies - and this is the only reason why this quilt became completed so quickly. 
 I promise this quilt is square, it's just hard to get a picture in our backyard without wind effecting the quilt. 
 I am pretty happy with how this quilt came out.  It's 50" square, which is definitely bigger than what I would normally make for a brand new baby.  I didn't want to have leftover blocks and it can be used for a long time, right?
 I sashed the blocks in a Cosmo Cricket Early Bird cross-hatch print.
I made a pieced backing with leftover fabric pieces - a process  that always makes me feel relieved to put some prints/pieces to good use rather than continuing to languish in my stash. 
 I bound the whole quilt in a blue polka-dot binding.  I am looking forward to delivering this quilt to my friend and her new baby- but I am definitely going to wait a little while to be sure that our family is germ-free!

Thursday, July 12, 2012

Nemesis

I have been buried under my Jingle projects but I am finally finished and ready to complete some other projects. The Jingle items will be revealed next week, I can't wait to share them with you!

I am undergoing the scary project of moving all of my fabric and sewing supplies out of my son's room to make room for his sister. As I have been organizing and sorting my junk, I found a bunch of bee blocks from one of the first years I had joined my local traditional guild. These squares have always made me feel frustrated because out of the 7 blocks I received back - only 3 were done correctly - and I am not just talking about correct seam allowance and the basics. I mean that several people completely ignored the instructions and I had a whole lot of seam ripping to do! Well, a friend just had a baby girl and I was all set to whip something up with some Pop Garden squares I had lying around - but luckily I remembered that my friend prefers earth tones and really likes the color brown. Booya! I know she will like these fabrics and colors - so it finally felt worth it to tackle my nemesis: I am working on sashing now and will post when it is complete.

Monday, June 04, 2012

Patchwork

I think it has been at least a year since I cut strips for this quilt and now the top is finally done.  It's nothing but simple patchwork squares (5.5" unfinished) done in a strip piecing method. 
 The top measures 85 x 100.  I had a TON of squares left, so I made a pieced backing that I will post about shortly.  I plan to long-arm this when I have the opportunity to leave my baby with my husband.
I am so glad that I included that Ty Pennington "Asian Floral" print (the one with the white flowers on the very dark grey background).  I often get scared to put dark fabrics into my quilts like this - but it really helps the composition of the quilt.  It makes me think about using more black and dark fabrics in my quilts in the future.

Monday, May 14, 2012

What's Been Going On

When Charlotte was three weeks old, I used some rare free time to submit registrations/entries for the Chelmsford Guild Quilt Show.  When I went to bring my quilts to the show for display this past weekend, they had no record of my registrations.  Much less has brought me to tears of frustration lately but I maintained my composure.  One of the ladies asked me, "How sure are you about doing this?"  I replied, "Let's put it this way.  I have a two month-old baby and I managed to pull everything together to make this happen."  Fortunately, it all worked out and my quilts made it into the show and the lady who had neglected to pass on my registrations apologized for her oversight.  (I was just glad that I hadn't done something dumb like misspelled her email address or something!)

I submitted the grey and purple mosaic quilt:
 I have found a few minutes here and there to work on this:
 Nick took Gregory on a father/son campout this past weekend and their absence afforded the opportunity to make another "Sweet Little Dress":

 I did a little fabric shopping on a fabric.com sale:
This blog is going to continue to be pretty quiet because I need to make some progress on my "Jingle" project, which will be debuting in July.
Thanks for reading!

Tuesday, May 08, 2012

Sweet Little Dress(es)


I finally found a little time to make Charlotte her first handmade-by-me outfit: Sweet Little Dress.  I did the 3 month size from a pattern by Leila and Ben, found here.  I used fabrics from my stash.  It was very easy and probably took about an hour.  I already have the fabric combination for another one sitting on my sewing table.
Here she is sporting the new duds:


Charlotte had her baby blessing this past Sunday at our church.  She wore a dress that my Great Grandmother Brown made for my mother.  My sisters and I were also blessed in the dress - so it's been used for three generations now!  I loved the concept of using such a special family heirloom for my daughter. I should've taken a better picture of the dress, petticoat, and bonnet, but here we are on that special day:

Tuesday, April 24, 2012

I sewed for the first time in 2+ months last week for a whopping ten minutes.  I know a lot of people have more than two kids and maybe I am a whimp - but parenting more than one child is serious business!  I feel like my previous life with just Gregory was a cakewalk.  My life is pretty chaotic lately - my Google Reader has topped out at 180 unread postings, Gregory broke the bird mobile today (definitely not the first thing he's destroyed since his sister was born!), and it's all I can do to just keep everyone safe and fed somedays.  I think I can say, with confidence, that my days of completing 27 quilts in one year are over.  Of course I am grateful for my family and a new little one - but it's been quite an adjustment.  If the stars align and I actually have a moment to myself - I always choose sleep over sewing!

I don't have anything to show you that I have made lately but I figured I ought to post about this adorable quilt my friend Rachel made for Charlotte with a few pictures showing it being in use:
 I am sure the quilt is her own design and I am so impressed.  Charlotte is one lucky girl to be surrounded by so much handmade goodness!
 I did manage to attend (and run! - with Charlotte in tow no less!) our latest BMQG meeting at Laurena's Longarm Quilting Studio in Burlington.  It was a great meeting and I really, really enjoyed seeing my friends and getting out of the house. 


Wednesday, March 21, 2012

Sewing for a Girl

Thanks so much for everyone's kind well wishes on the last post - I am sure you understand why I couldn't respond individually! Last night, Charlotte slept for 7.5 hours - so I figured I could manage doing this post today just to check in and share some pictures of the crafty things I had made in advance that are now finally in use.

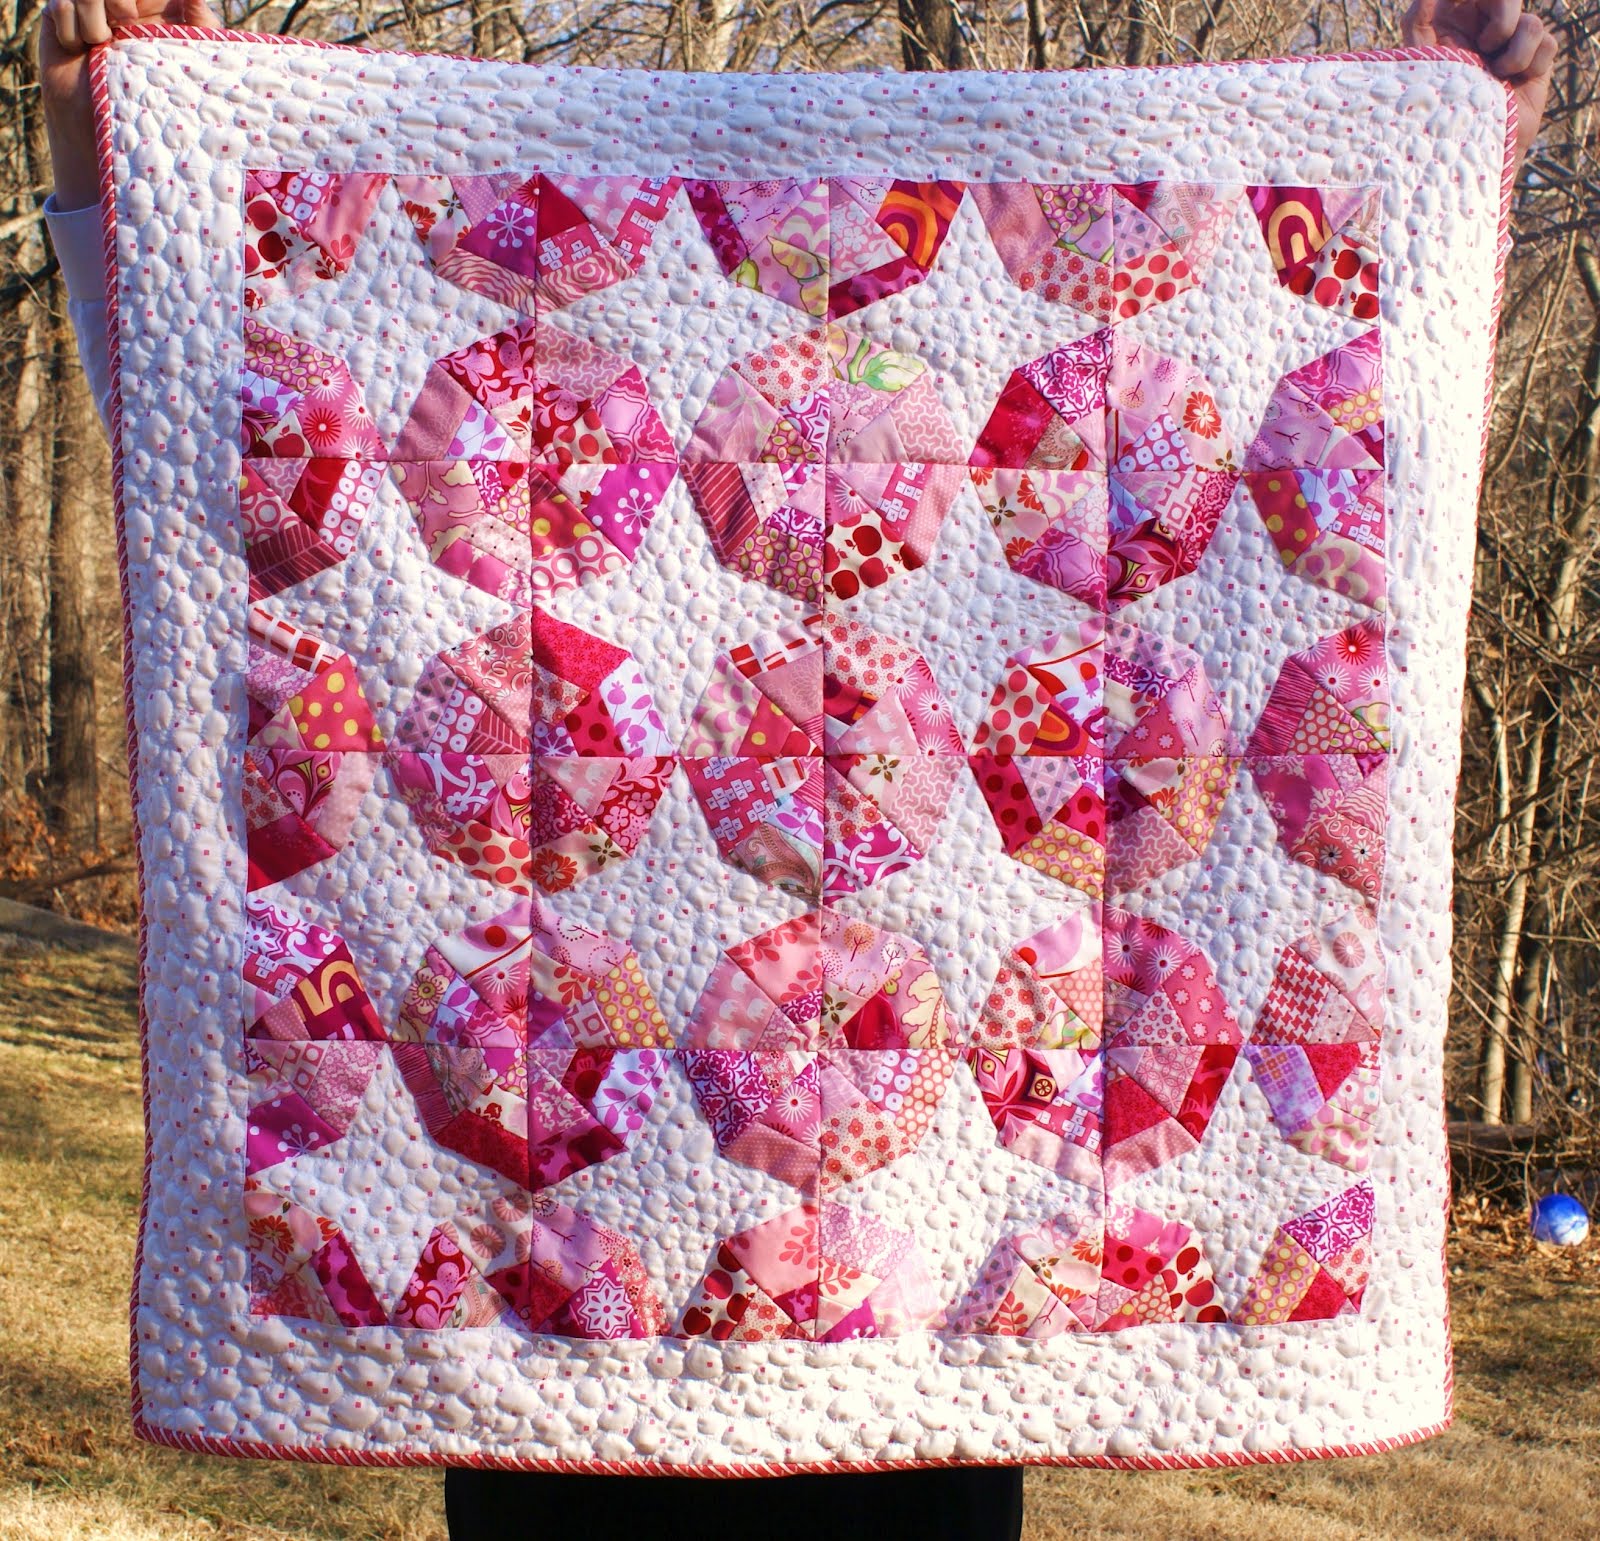
I made this sleep sack last spring - right before I got pregnant. I really like using it with her- definitely a functional item. We are using the spiderweb quilt a lot - I thought 40" x 40" might be too big for a newborn - but it's just fine. I even used it myself as a lap blanket in the hospital.

I didn't find out the gender before my son was born either, so I had made several items out of Heather Bailey's Freshcut range in addition to boy stuff. Lots of people asked me why I made the pink spiderweb quilt (pictured above) when I had already made a girlish quilt in case Gregory had been a girl... Well - I am such a different sewer now and my tastes have changed. The Freshcut quilt (pictured below) is so different because it's made from only one collection, it follows a pattern, and I paid someone else to quilt it. I much prefer the spiderweb quilt that is scrappy, backed in minkee, and I feel like I exercised much more creativity in my design.

I have a confession - I have been guilty of buying girly fabrics for a "if I ever have a daughter" stash. Of course, I have much more boyish fabrics in my stash- but I definitely have a love for all things pink! It's exciting to think about the things I could make with these: A few fabric pre-orders have come in as I have been recovering. Packages of fabric definitely add some excitement to my new and hectic routine. I was very happy to get my hands on some of these basics - the Pezzy Print from Sandy Klop of Moda:


Of course, I am on the FMF bandwagon and I am so happy to have some of these - pictured below are my three favorites!

Next time I post, I promise to show you something new that I have been working on but it will probably be a while. I am not one of those bloggers that can just whip up all sorts of projects after having a baby - I am definitely impressed with those that do though!

Thursday, March 01, 2012

Introducing Our Newest Addition

Guess who gets to use this quilt for a little lady..... Introducing Charlotte Jane Matthews born 2/29/12 at 9:39 AM; 7 lbs 11 oz, and 20.75" long. We couldn't be more thrilled! And I do have to say that I am absolutely SHOCKED that we had a girl - I guess I had been counting on another boy all along.....

We are so happy to have a sweet little girl join our family. I know I am not going to be getting a ton of sewing done - but I am already daydreaming of all the girly projects I want to make.

Thanks for everyone's well wishes and support!